Our family is scattered across three continents and frequent visiting is difficult for multiple reasons. While I make it a point to see my parents back in Europe at least once a year, the last they saw my wife and their granddaughter was 8 years ago or so. It was about time we planned a trip, but with a twist: let’s rent a car this time round! I can check some places off my ever-growing bucket list and all of us can visit places we’ve never seen before. In addition, wouldn’t it be fun to do it in an EV?
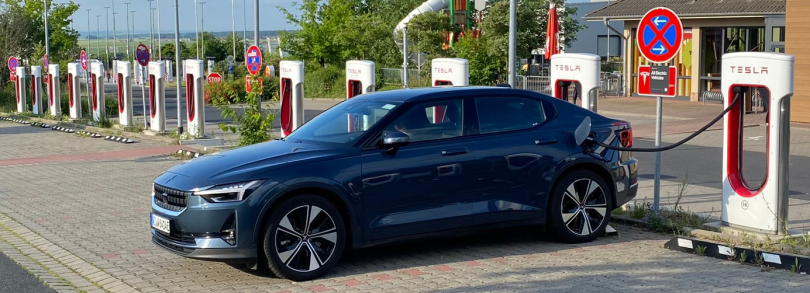
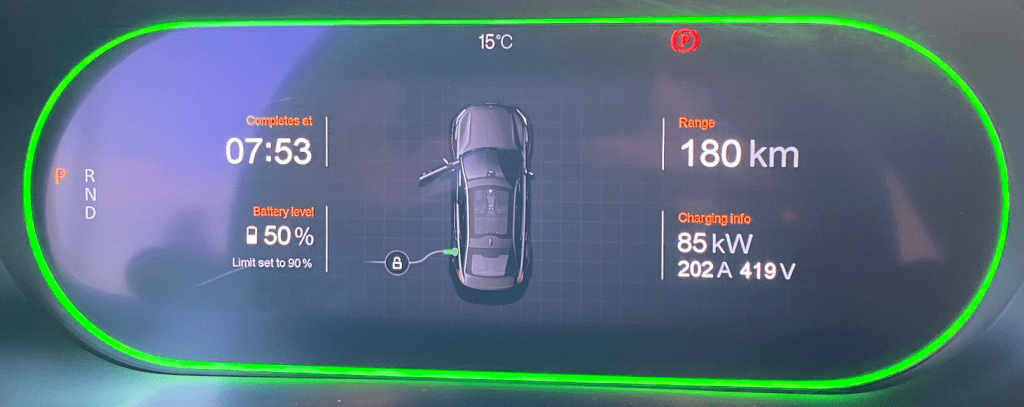
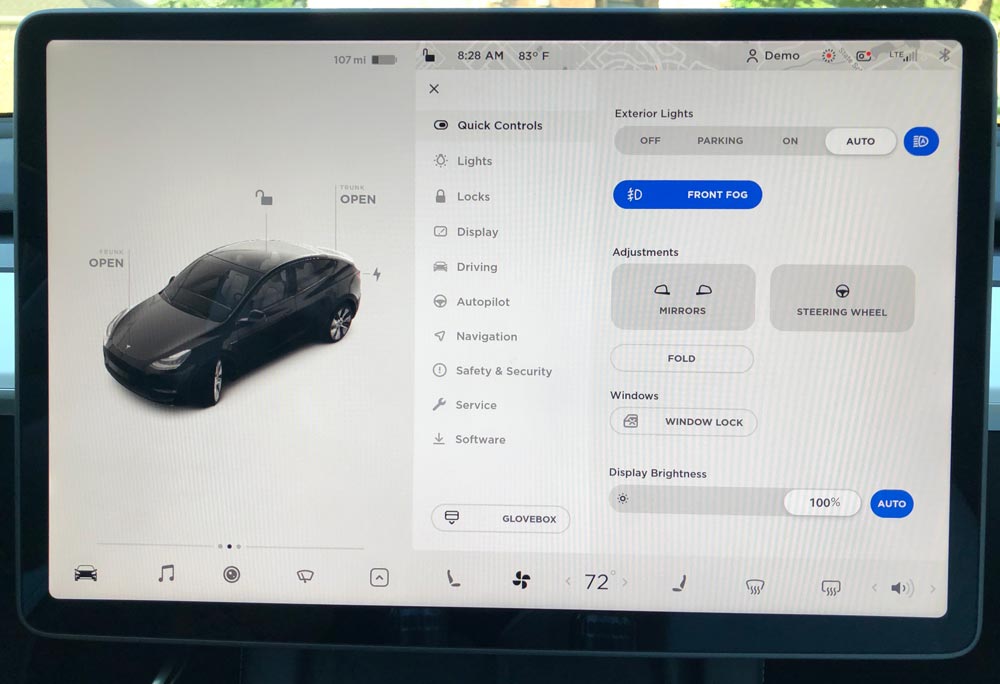
Flights and the car reserved, it was time to plan the itinerary. Since we booked Tesla Model 3 Standard Range, we had to make necessary arrangements for charging along the way. We ended up with a slightly different car at the end, but it didn’t affect our plans much.
Our trip would start and end in Frankfurt, our go-to airport when transiting in Europe. I didn’t want to drive too far on the first day, especially after a long flight and potential jet lag.
Würzburg
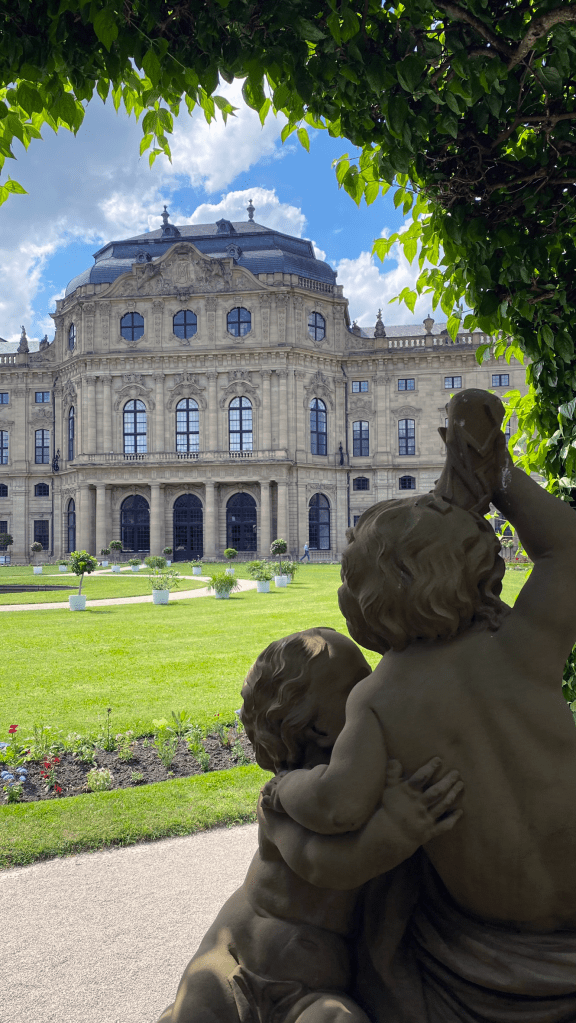
We decided to stay in Würzburg overnight. a beautiful town, famous for its Residence, Marienberg Fortress, Main Old Bridge or the Cathedral. Sadly, close to 90% of the city was destroyed during allied bombing in 1945, then painstakingly restored in the following decades to its present glory. It’s definitely a place we should visit again, as the overnight stay didn’t allow us to venture around and see all we planned to see.


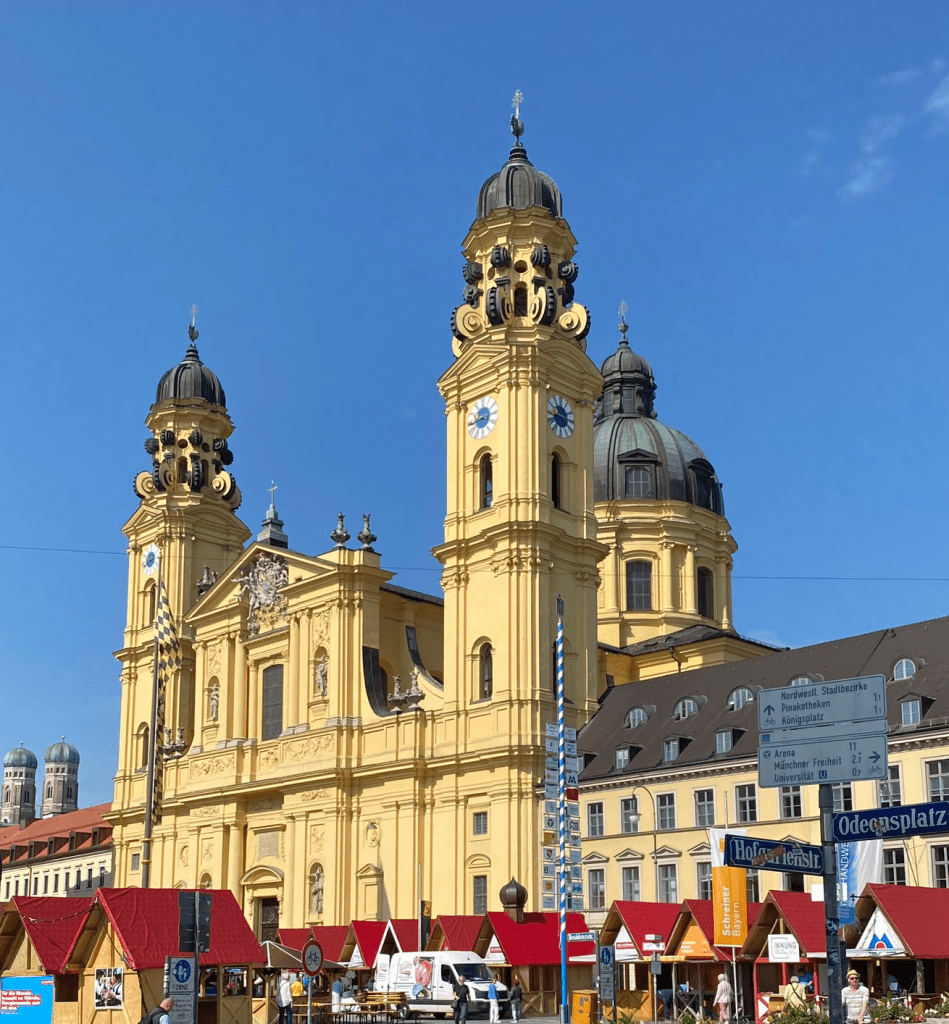
Our next major destination was Munich, but we chose a scenic route through the Romantic Road (Romantische Straße), so we could visit the famous Rothenburg.
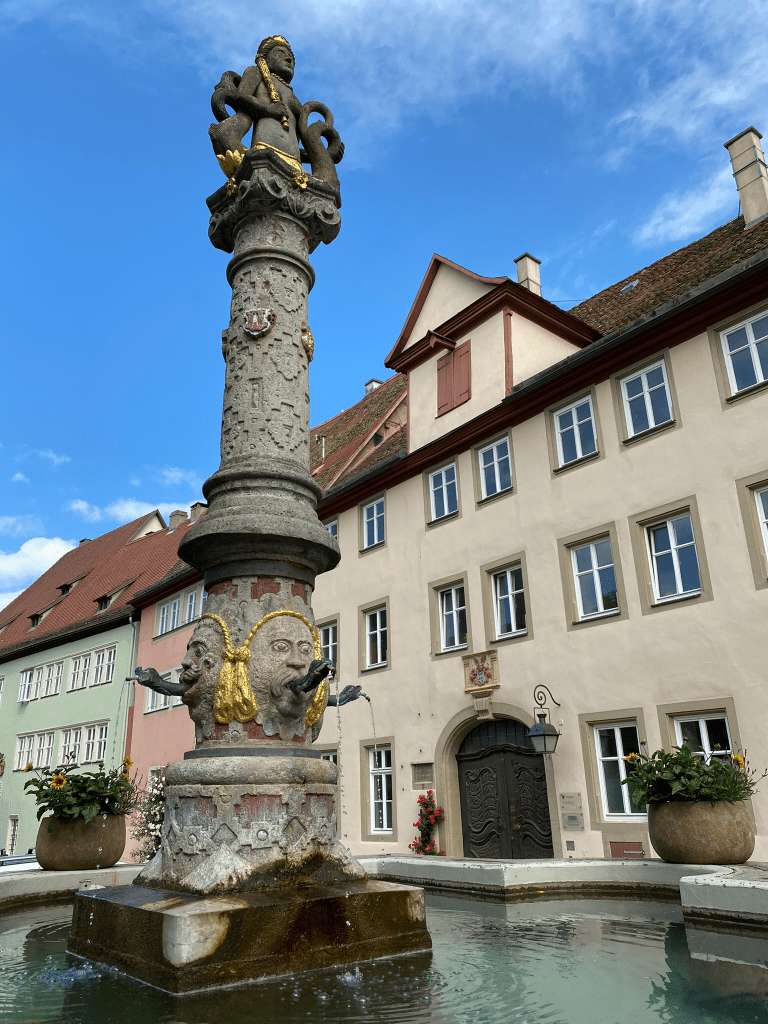
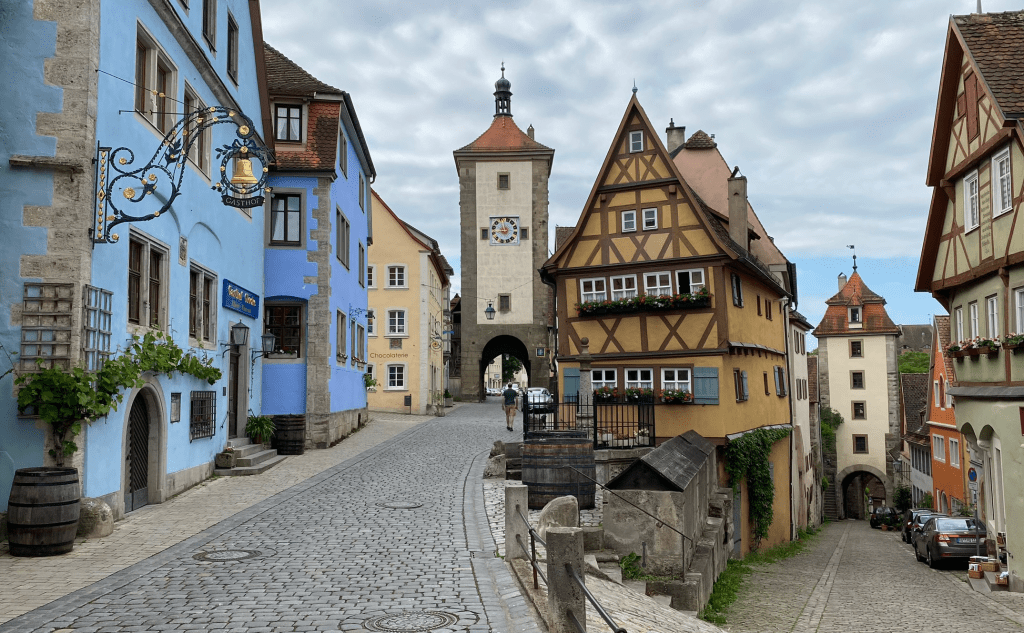
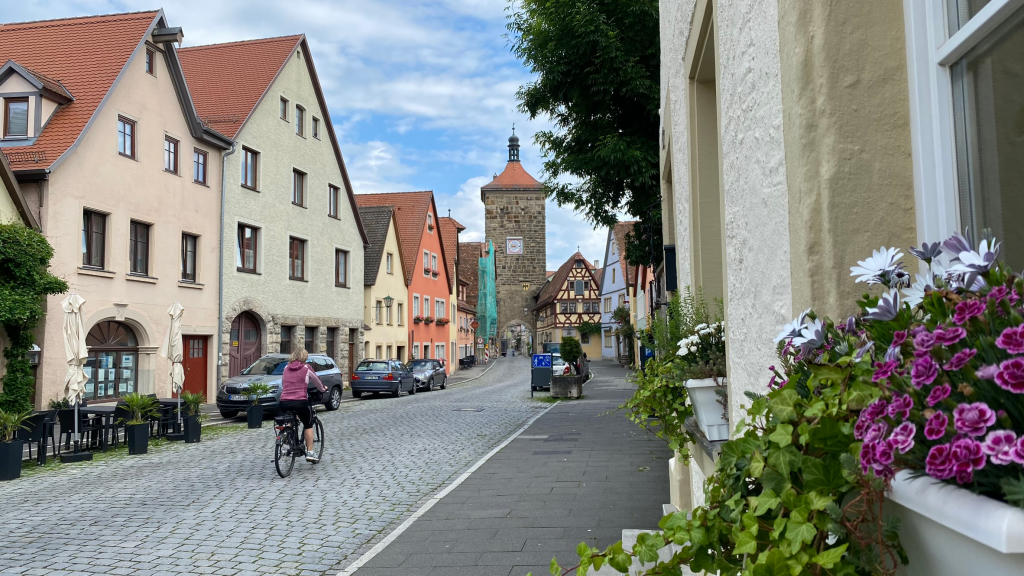
Rothenburg ob der Tauber
Known for its medieval architecture and half-timbered houses, it’s a quintessential German town that attracts millions of tourists every year. Kobolzeller Steige and the Spitalgasse area are some of its most photographed and recognizable landmarks, but there’s so much more to see. The great thing is that Rothenburg is a very walkable town (despite cobblestone streets) and one can cover most of the attractions within 2-3 hours. It pays to arrive earlier to beat the crowds, which we did. Plenty of parking is available, right outside of the fortified walls.


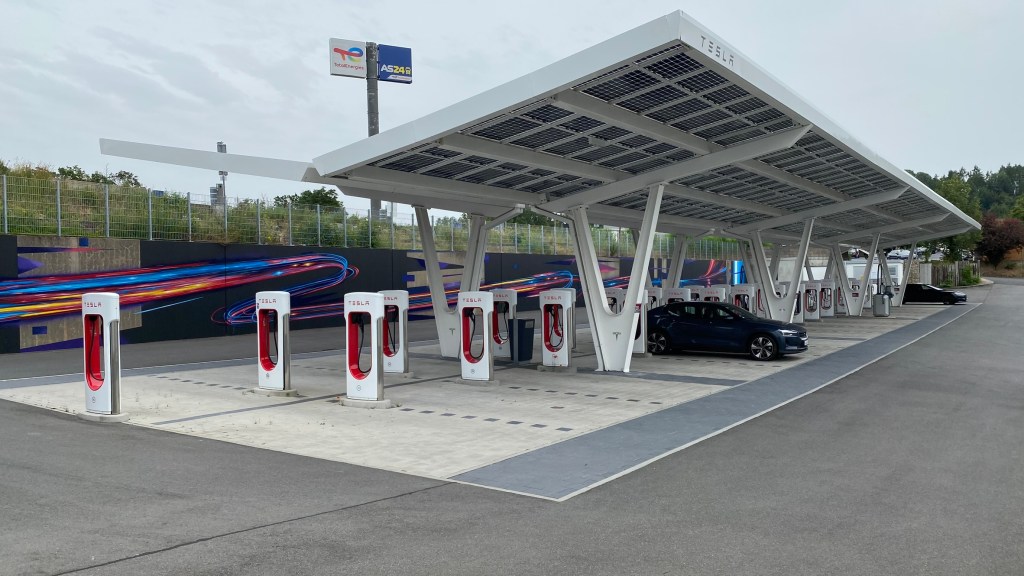
On the way to Munich, we had to make a stop to charge the car. Enter Zusmarshausen charging hub – the most impressive location for EV charging we’ve encountered so far! Catering to all kinds of EVs, from small to large, its amenities include a bar and super clean toilets.


Since our hotel room would not be available until late in the afternoon, we made another pitstop in Augsburg – to visit the Wolfgang Lettl museum. Highly recommended if you’re a fan of modern or contemporary art!
Munich
No matter how you approach it, cars plus cities in Europe equal expensive parking. Sure, there are certain accommodations and cheap(er) options when driving EVs, but they usually work if you intend to stop for a few hours only. For overnight, either you find P+R (park and ride) or pay for the hotel parking. Since we were staying for a couple of nights in Munich, the latter made more sense, as we would rely on public transport to do our sightseeing.


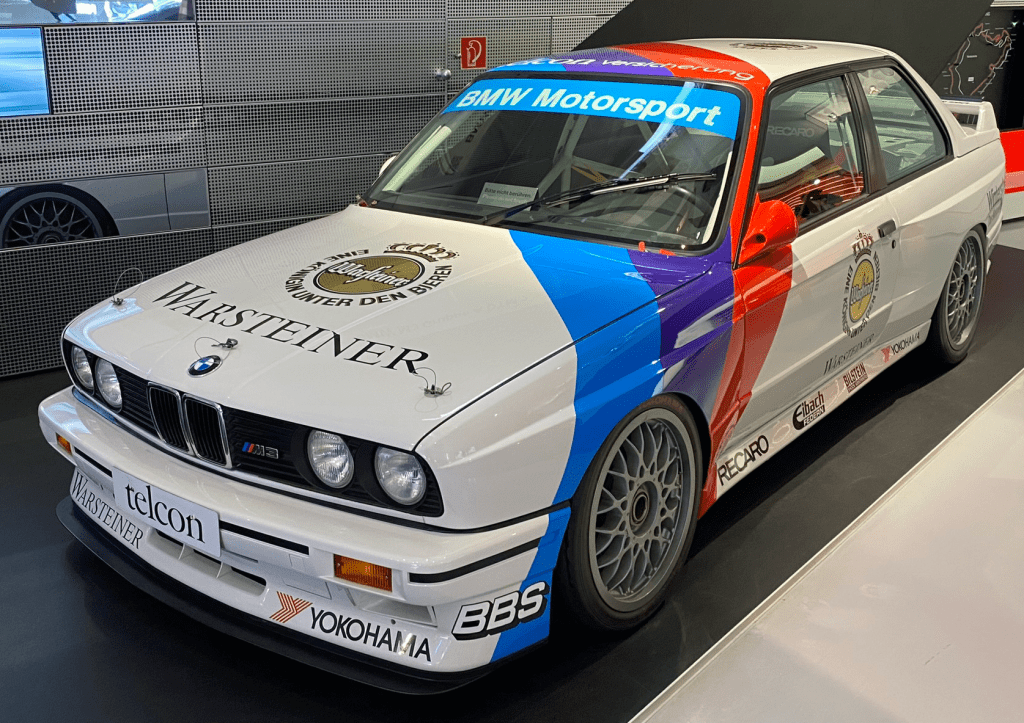
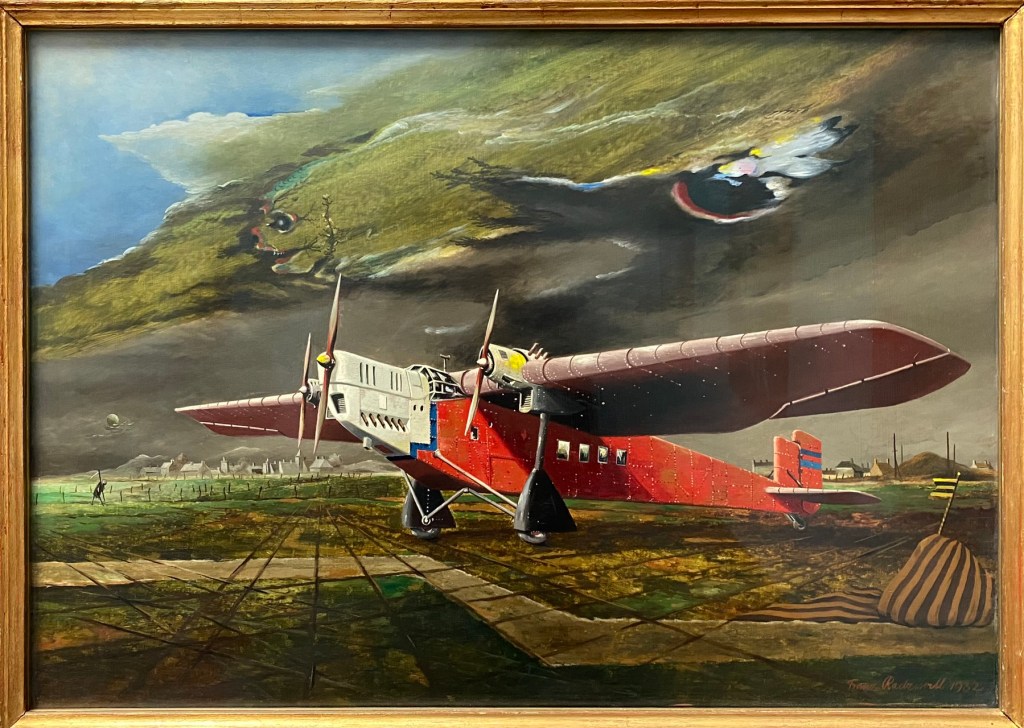
Why Munich? Other than being the capitol city of Bavaria, the primary reason was to visit the BMW Museum and BMW Welt – something that was on my bucket list for a very long time. Since my early teenage years, I considered BMW to be the best automotive brand in the world (and with the best looking cars, too). While their design language in recent years leaves me rather disappointed, their contribution to automotive history is undisputed. Who wouldn’t like to see the iconic BMW-Vierzylinder (BMW four-cylinder) headquarters up close?

I really wanted to book a factory tour as well, but there were no open slots during our planned trip, unfortunately. We settled for BMW Welt – Behind the Scenes to complement the Museum visit. Here’s the tip: BMW Museum – absolutely worth the price of admission. BMW Welt though… do yourself a favor and check out the free exhibits (90% of the building). In my humble opinion, the Behind the Scenes is not worth the money.
Back to the Museum, it’s truly impressive. Multiple floors of exhibits, walking you through all important milestones from the history of the Bavarian giant: from its roots in aviation, through its motorcycle division, and to the iconic car models which put the brand on the global map to its continuous innovation and future concepts, it is a must see for both diehard BMW fans and automotive enthusiasts alike.
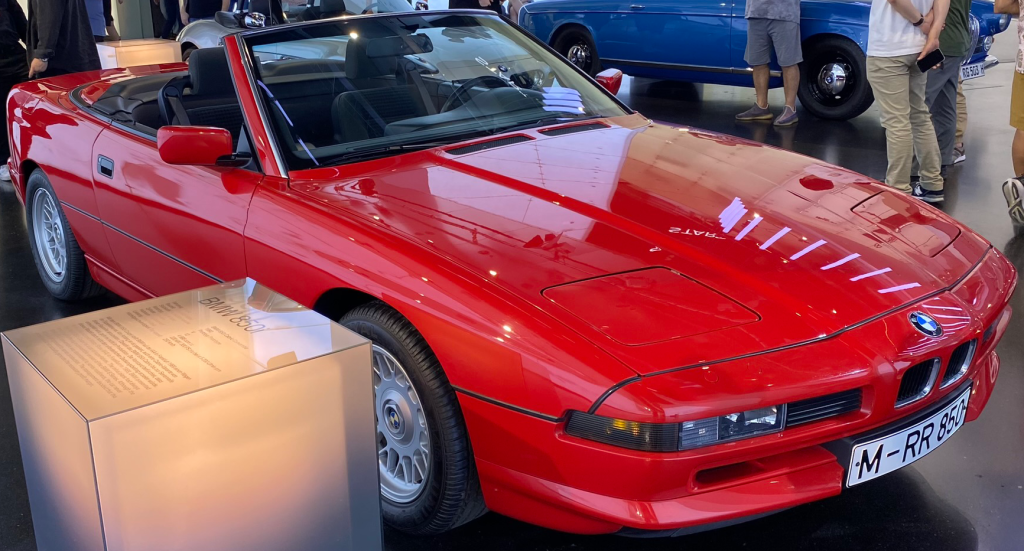
Below are just a few of my all-time favorites.


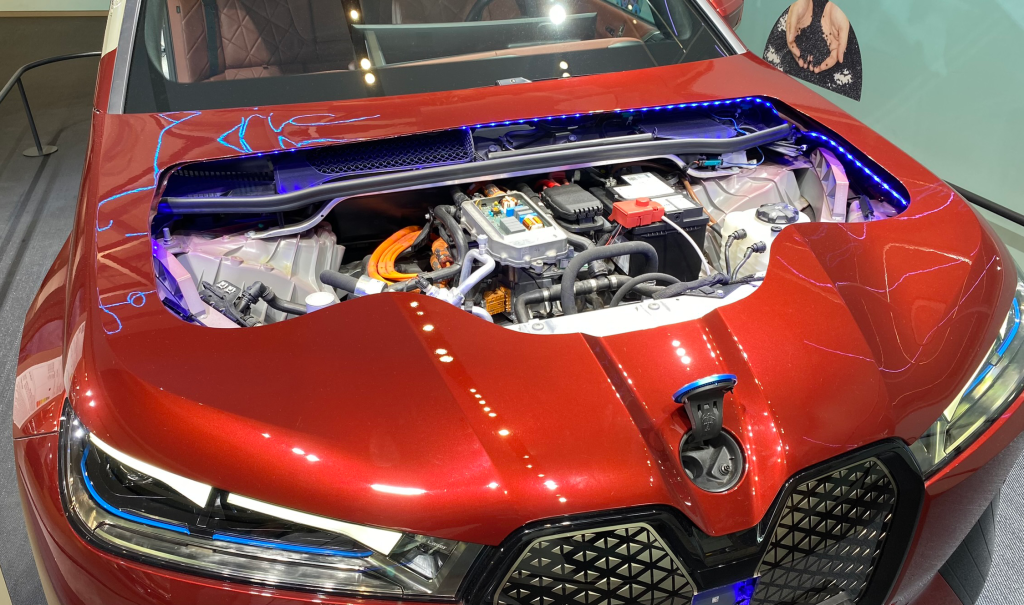
Final thought on BMW and its approach to electrification: why not learn from Tesla? While the cross iX platform display is really cool (the cross-cut reminds me of the opening of the Terminator movie), the overcomplicated layout of the components and lack of usable frunk or space under the trunk are disappointing.

The next stop on our itinerary is what really started my wheels turning when thinking about this trip. Next to BMW, it was always the ultimate bucket list item when thinking of Germany.
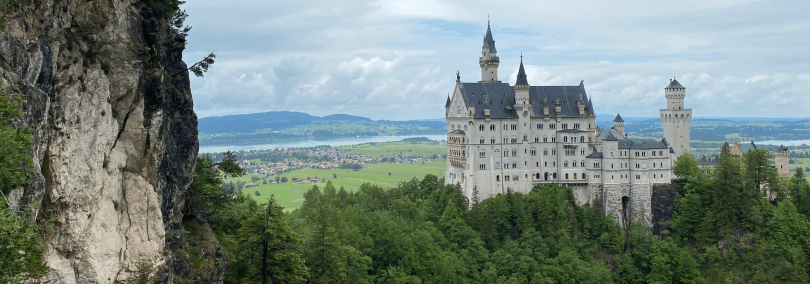
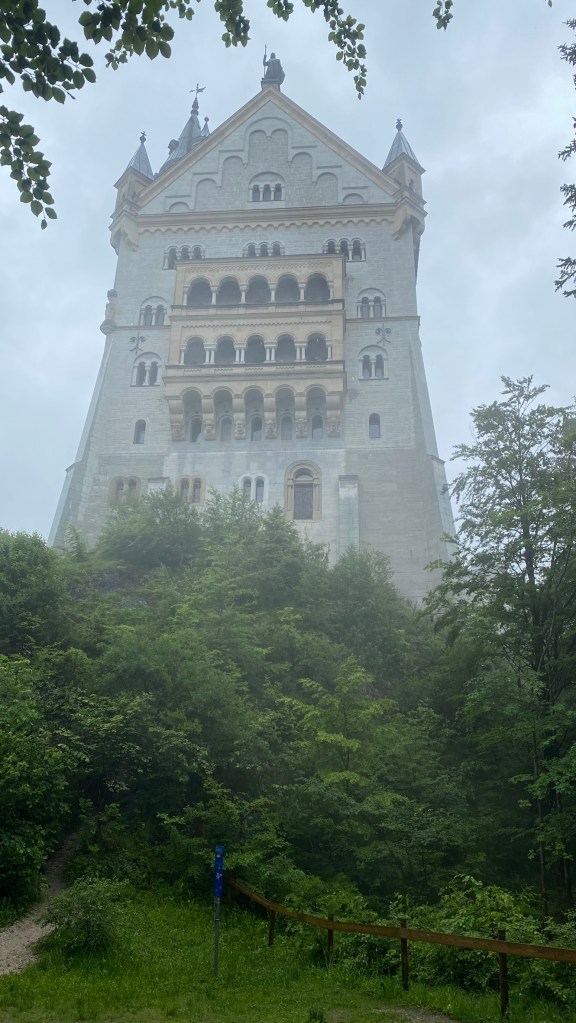
Neuschwanstein Castle
My first encounter with this famous landmark was probably during one of the winter breaks while in elementary school (mid 1980s). My father borrowed a jigsaw puzzle featuring the castle and I was finally allowed to put it together once he was done with it. “Out of this world” was one of the thoughts I’m sure crossed my mind when looking at the picture back then.
A passion project of Ludwig II, the young king of Bavaria, executed lavishly and with astonishing attention to the tiniest details, taking an example from the finest achievements of middle ages, while at the same time employing the latest in technology of the XIX century. The results, albeit never completely finished, are amazing. Tragically, the king only enjoyed the fruits of his vision for a few months before his death. But the legacy remains for all of us to see, be inspired and have our breaths taken away.
Some can argue that it is kitschy. It’s all subjective, sure. To me, the castle is a marvelous piece of engineering and ultimate example of craftsmanship, from masonry through sculpting and painting to woodworking. Forget about the material cost of the construction for a second. I don’t think this kind of idea could be conceived in modern times. Even less likely executed and constructed. It always take a bit of crazy to come out with something of this scale. Truly one of a kind.
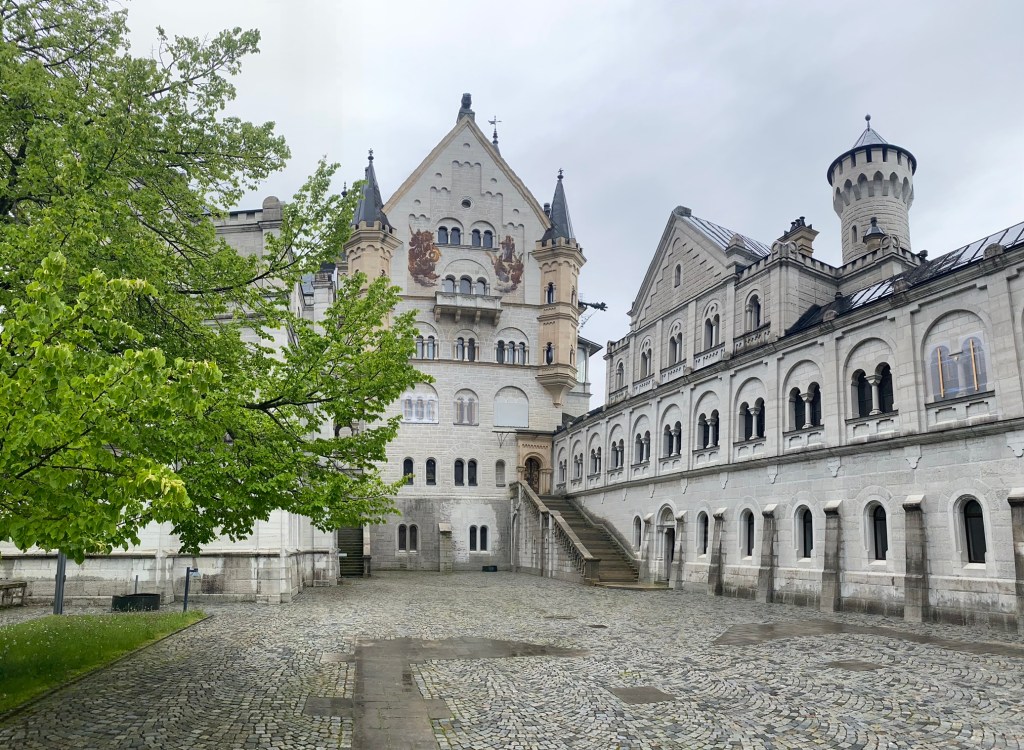
Let’s get back to our trip before I get too carried away. At first, it didn’t seem like we would have particular luck with the weather during our visit. It was raining steadily on our way to Schwangau (where the castle is located) and turned into a solid downpour while waiting for a bus to take us to the Marienbrücke lookout point. As the rain eased out a bit, the first opportunity to have a glimpse of the castle was a bit eerie. Not ideal.

Good thing we did the tour of the interior of the castle (sadly, no photos or video allowed inside), as the rain eventually subsided and we had a second chance at taking some decent shots.

Neuschwanstein was our goodbye to Germany, as our next destination was Salzburg. Crossing from Southern Bavaria into Austria, you’re in for a treat, as the road leads through some beautiful sceneries. Even the Tesla supercharger stop in Piding offers some amazing vistas!

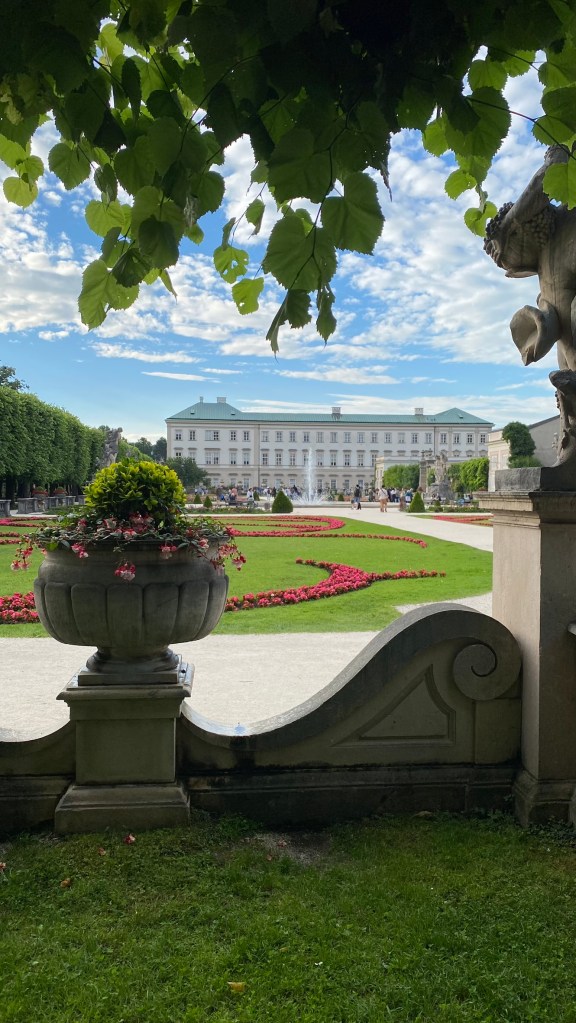
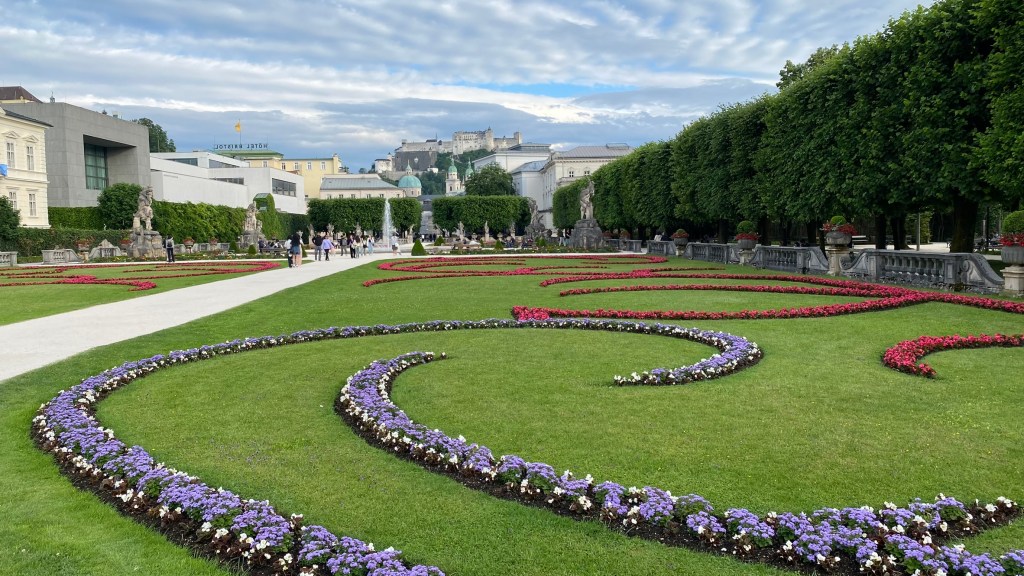
Salzburg
One of our all-time favorite destinations we’ve visited numerous times. Also, one we can’t resist stopping by every chance we get, even if just for the night. It just happens to be on the way to our next point so why not? 🙂


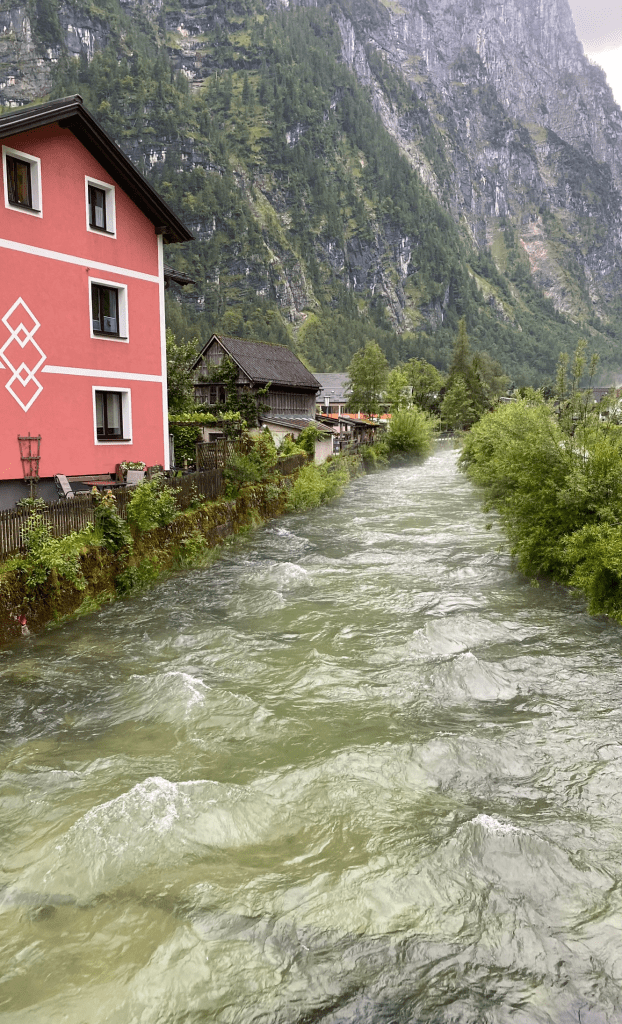
Hallstatt
Continuing on, another iconic place to check. The weather threw another surprise at us and we had to reach out for the umbrellas once again. Maybe not the most ideal situation for taking pictures, but we have enjoyed the stroll through the streets of Hallstatt none the less. Bonus: there were no crowds to compete with. Definitely a place to come and visit and possibly stay for a day or two in the future.


The next attraction on this list was very special for both our daughter and me.
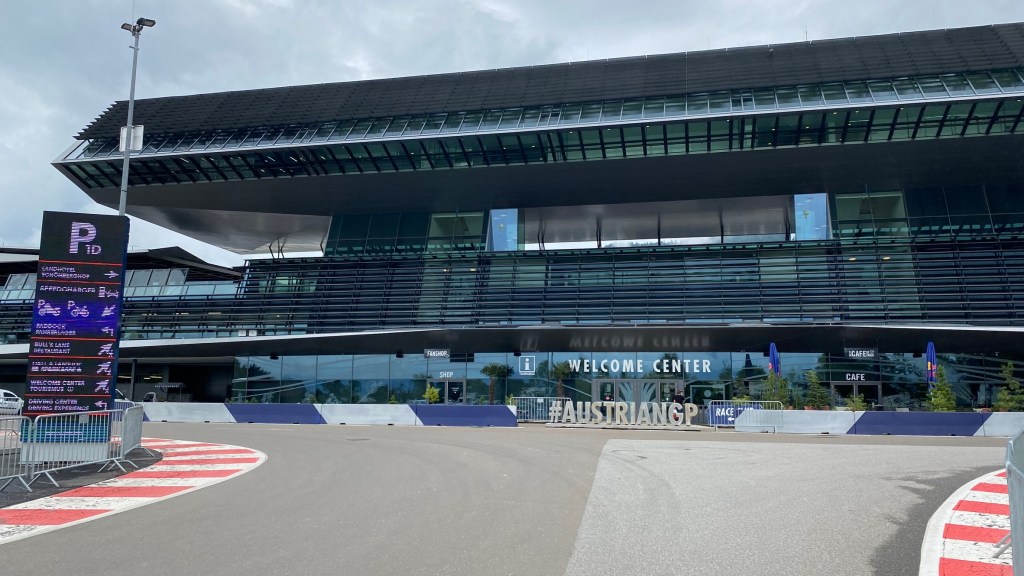
Red Bull Ring, Spielberg
It was a promise fulfilled for her (as a present for her high school graduation), but I won’t deny it was exciting for me as well. We both enjoy watching Formula One and it’s one of my favorite circuits in Gran Turismo on PlayStation.
The excitement started building up as we were approaching the facility. Huge banners with Red Bull theme welcoming visitors. The roar of GT3s at the circuit as we stepped out of the car and walked towards the visitor center. This place is awesome!
A short few minutes later and we were greeted by our friendly tour guide. He was very accommodating and allowed us to spend time asking questions and taking pictures. We’ve had a glimpse at the areas that are usually out of reach for us mere mortals (unless you fork out cash for a VIP pass):
- pit lane
- podium
- cooldown room
- VIP lounge
- the whatchamacallit tech room with all the camera feeds


We were allowed and even encouraged to walk the underground tunnel that brings you to where the team trucks are usually parked. Unfortunately, we didn’t get up to the iconic bull sculpture, as the preparations for upcoming GP were already underway. Still, we had a blast. To think we shared the same walk and visited the same rooms as the car racing gods like Jackie Stewart, Niki Lauda, Ayrton Senna or Michael Schumacher before us… unbelieveable! From now on while watching the Austrian Grand Prix back at home we can say it out loud “we’ve been there!” 🙂
There’s many photos we have taken at Red Bull Ring, but I am not going to spoil all the fun. If you have the opportunity, plan a visit and you won’t be disappointed! Ok, last bite in case you are not yet convinced:
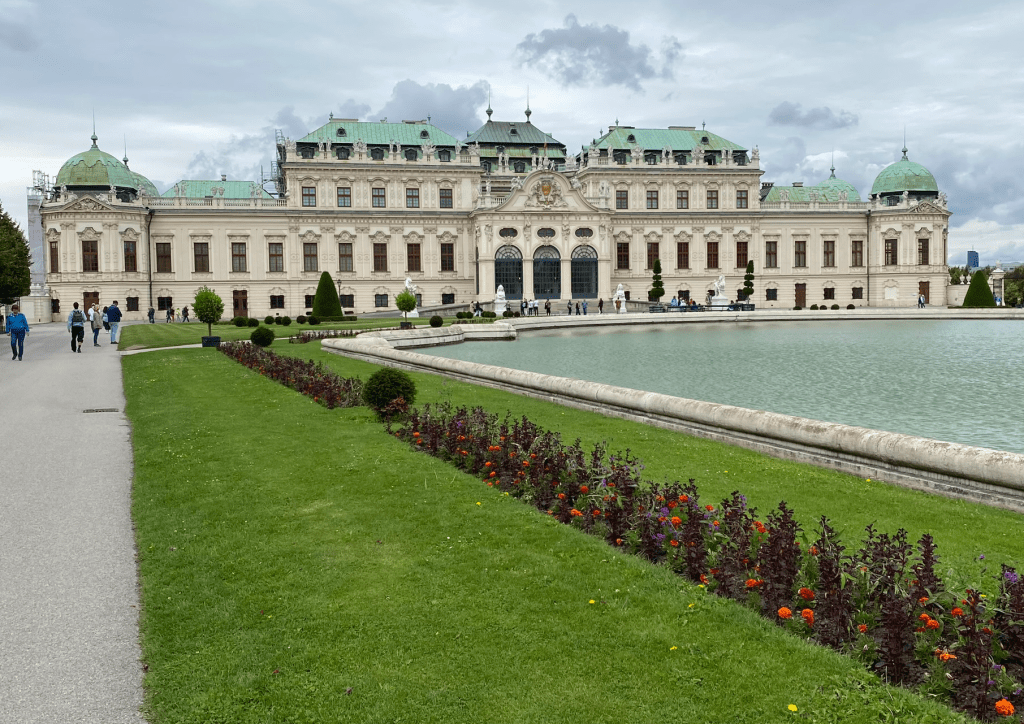
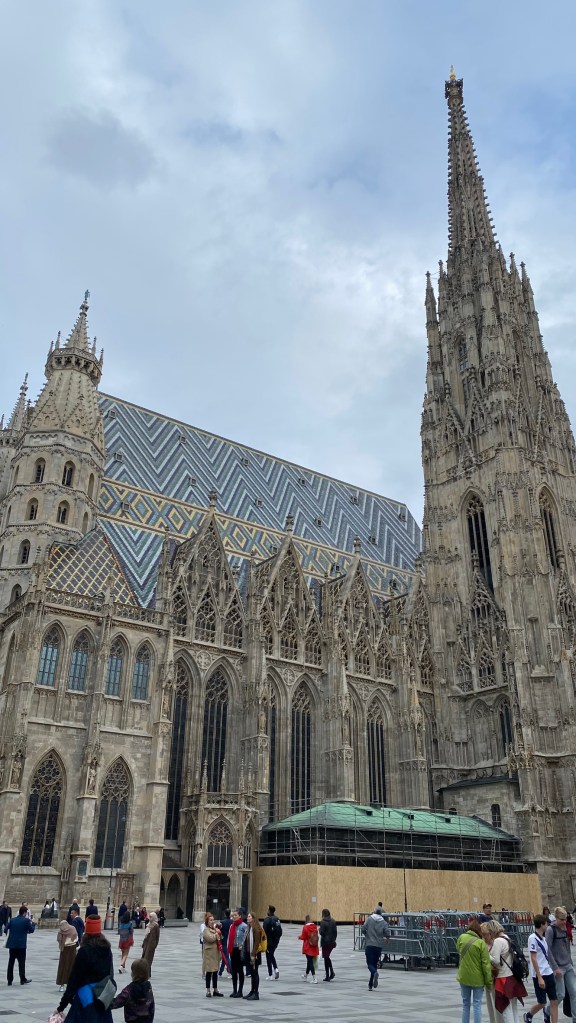
Vienna
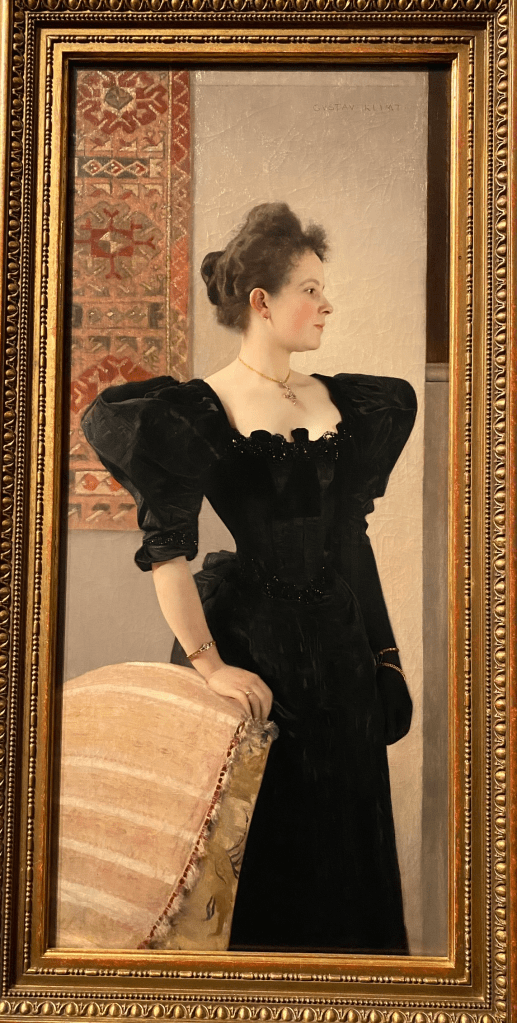
Together with Salzburg, one of our favorite destinations. A must-visit for us whenever we are in this neck of the woods. Our main focus was on checking out some of the great museums Vienna has to offer, primarily Gustav Klimt’s exhibition in Belvedere (which we missed last time we were in the city) and Leopold collection of modern/contemporary art. Of course, one has to say at least a quick hello to the traditional tourist attractions. And yes, Stephansdom is undergoing some renovation again.


* * *
The other part of the trip was visiting my family in Poland. We mostly spend time chilling out together, so not much in the breathtaking scenery department to post here :).
* * *
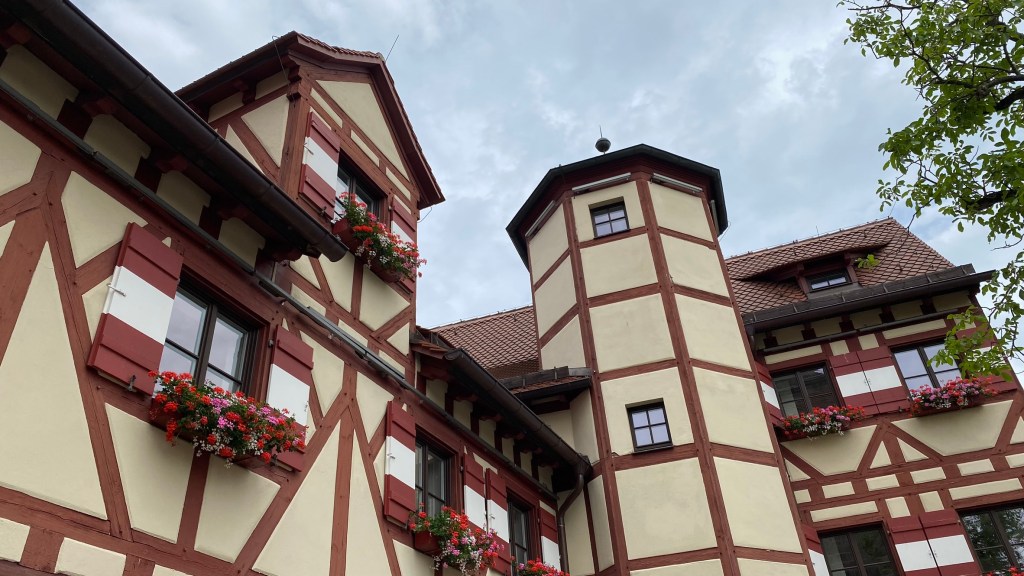
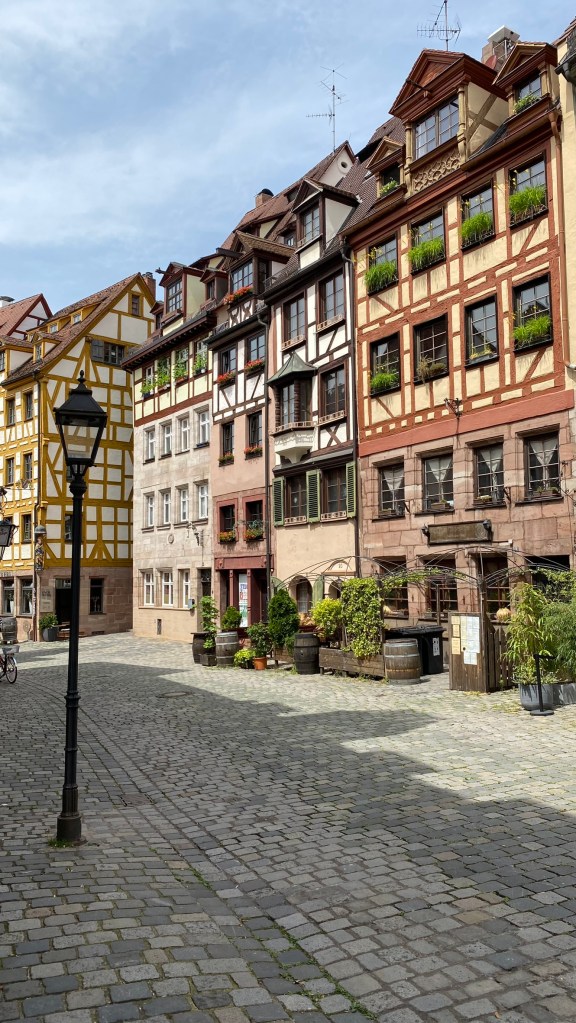
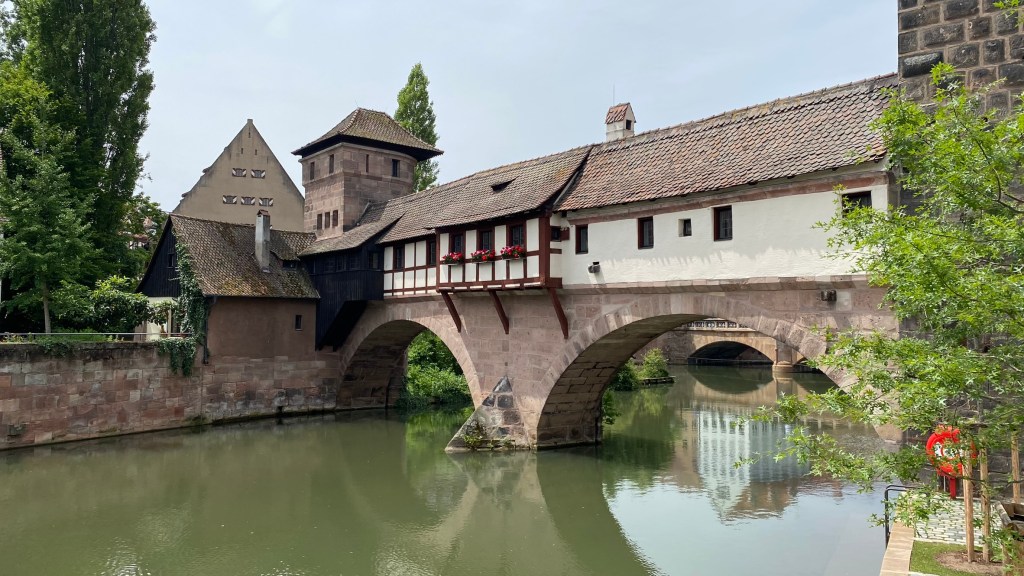
Nuremberg
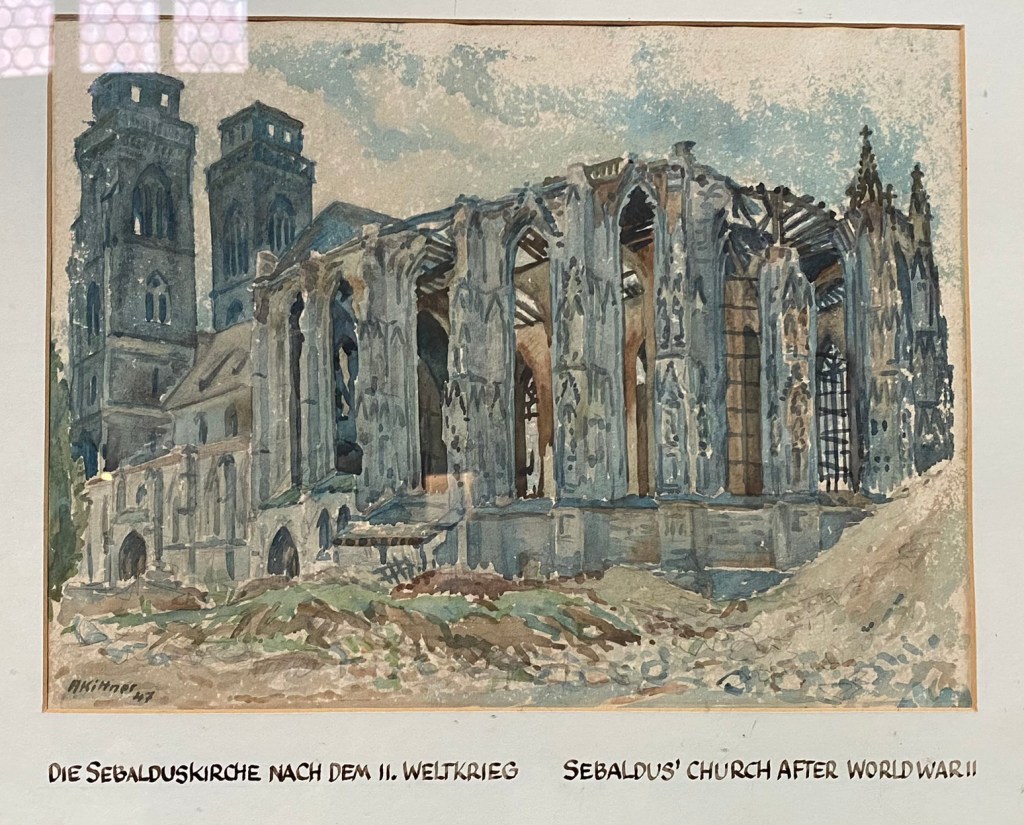
For most people, Nuremberg is synonymous with the Nazi rallies during Hitler’s rise to power, and later their trials after WWII. There’s much more to this city though. It’s tumultuous history is reflected in many of its landmarks, from middle ages, through 30 Years War, Napoleon era until the modern times. It’s also a birthplace of Albrecht Dürer and Johann Pachelbel. Its historical St Sebaldus’ church – badly destroyed during the war, but subsequently restored to its previous glory – holds a lot of interesting historical artifacts, some dating to the early XI century!


On the way back to Frankfurt, we had a quick charging stop in Geiselwind – one of the nicest Tesla superchargers we’ve seen!

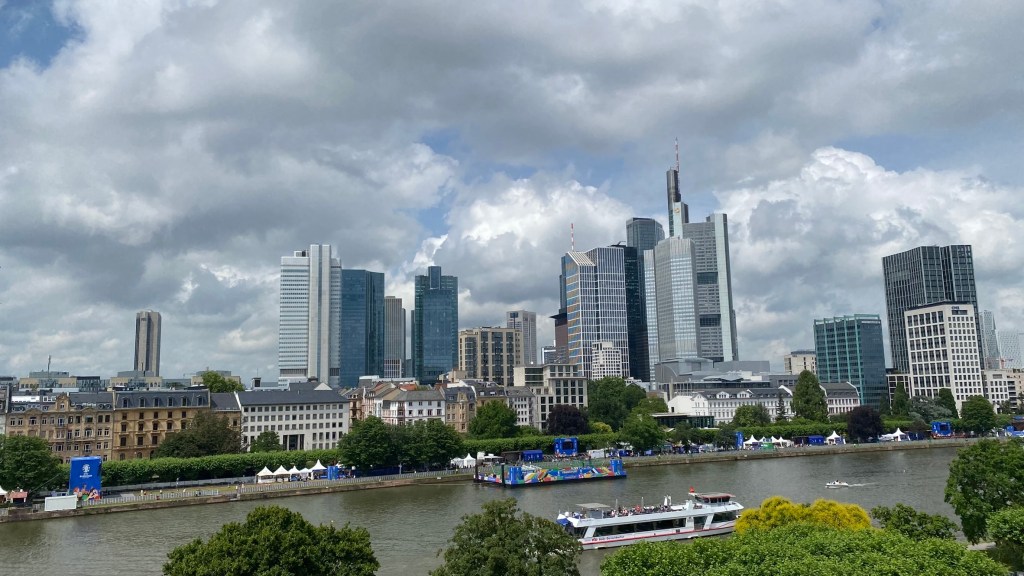
Frankfurt
Final destination of the trip. Almost all our visits to Europe transited through Frankfurt airport, but we’ve never had a chance to explore the city. We finally did. Caprices of the weather didn’t stop us from exploring the old town. We were planning to check out the Städel Museum anyway. The museum features over 700 years of art, from Old Masters to modern exhibits. One of the unique features added in recent years is the viewing terrace. I was lucky to be there during the few minutes when the sky has cleared up, so I could take a panorama shot of the city.


* * *
Here we are, then! Another great road trip in the books. Great places, wonderful memories. We’re already missing it! In case you’re wondering how was our experience renting an electric car for this trip, I have recently posted it here. It’s definitely something we will consider again in future!