

I have been considering solar panels for a long time. It came really close 7 years ago, but due to a back and forth exchange with my HOA (Homeowners Association, for those unfamiliar with the matter) the installation could not happen before the rebate from the city we live in would expire. So we had to scratch that idea for the time being, unfortunately.
Lots have changed since. While the technology saw only some incremental improvements in panel efficiency and energy output per panel, the price per Watt has dropped significantly in the last few years. Compared to the 7 kWh system (without battery backup) I was considering in the past, I now can have a 12 kWh system with battery backup for almost the same price. Also now that we have an electric vehicle, the incentive is even stronger to go greener.
After careful research I decided to go with Tesla for the solar installation. The process has just begun and there’s still a number of outstanding “ifs” and “buts” before we come to completion. For what it’s worth, I thought it would be beneficial to document the whole process here. If any of you are considering to follow a similar route, hopefully you will find this information useful. I will be updating this post as we get closer to having the system installed at our house. Fingers crossed that everything goes as planned this time round!
Day 1
I placed an order using Tesla’s website. The process is very simple. After providing your home address and average electricity bill, the website will offer suggestions regarding the size of the system and the estimated pricing:

You can modify the system’s size and opt in for the battery backup (which I did). Upon providing your particulars and placing a deposit of $100 your order is complete. The deposit is fully refundable should you change your mind throughout the process.
Within minutes, I received confirmation on my mobile phone. At the same time, I was asked to login to Tesla’s website and provide some additional information:
- Copy of recent utility bill
- Photos of the electric meter and its surroundings
- Photos of the circuit breaker box, including the close up of the manufacturer’s label and the main breaker
- Some photos of the garage itself
- HOA’s name (if applicable)
The whole process is done online, no interaction with any human being. However, if anyone from Tesla is ever to read this, I have one feedback: it would be nice to have a checklist of all the pictures that you are expecting the homeowner to take, so we can avoid doing an Easter egg hunt. In some fairness, you suggested completing this process using a mobile phone – now I know why.
Day 3
I received a notification from Tesla that my initial layout is complete and to go to their website to review it. Tesla uses an online tool to streamline the process of designing the system for each individual customer. I believe that they use data from Google (Project Sunroof?) to aid their design process.
The layout includes the visual representation of how the panels will be distributed on the roof, plus some technical specifications related to the type of solar panels, inverter, as well as a description of what Tesla Powerwall is about. Once you acknowledge the layout, you are asked to provide a digital signature to get the process started. You are also asked to:
- Provide a copy of the declaration page of your homeowner’s insurance policy
- Acknowledge and digitally sign that you are responsible for liaising with HOA to get any necessary approvals (so much for the hope that Tesla will do it on my behalf)
- Acknowledge and digitally sign your purchase agreement.
Day 4
Another notification on my phone. This time round I was asked to review and sign the permit application, so that Tesla can obtain the necessary approvals from the city before the installation can be performed.
Day 5
I found some discrepancies between the solar inverter shown on my proposed layout (SolarEdge) and the equipment listed on the permit application with the city (Delta). At this point, I also started having some serious doubts regarding the layout itself. My system would comprise of:
- 36 x Q CELLS 340 W panels for the total maximum output of ~12 kWh
- SolarEdge inverter
- 3 x Tesla Powerwall for battery backup
The panels themselves were literally added to Tesla’s offering just few days before me placing the order (together with some additional discount on the overall installation cost, I might add).
The proposed layout displayed a majority (22 of 36) panels installed on the North-facing slope of my roof. From all the research I’ve done related to solar panel installation the consensus always was that as long as you are living on a Northern hemisphere, you should avoid placing panels on the North side of the roof, as it will drastically reduce the amount of energy they can provide.
My other concern was related to the model and capacity of the inverter, as well as the use (or not) of power optimizers. The Internet can be both a blessing and curse, so after extensive research and reading a horror story or two related to an improperly designed photovoltaic system I grew a bit paranoid to make sure that when I am ready to take the plunge, everything will be done right.
The concern was two-folded:
- Solar inverter sizing – I wanted to make sure the inverter is chosen to match the peak production output of the panels
- Optimizers – SolarEdge is known for using power optimizers as an alternative to micro-inverters. The are compact devices installed underside of each panel and help to ensure that the overall system production is not affected by deficiency or malfunction of an individual panel (due to different orientation towards the sun, partial shading, cell damage etc.)
My last concern, albeit smaller, was related to the placement of the Powerwalls themselves. As much as I would like them to be on the wall in my garage, the reality is that my garage doubles as my weekend warrior’s recluse, so the amount of free space around or on the walls is severely limited. I know that Powerwalls are designed for both outdoor and indoor installations, but I’ve heard some comments regarding the maximum distance from the power gateway. Just wanted to make sure that this won’t be an issue.
Here’s where the human-interaction-free process throws a serious kink: when you login to Tesla’s website to manage you solar project, you won’t find any direct link to submit your questions or concerns related to the process. I managed to scramble up a couple of email addresses as well as a phone number for Tesla Energy from the contact information on the copy of the permit application. I also found another email address while scouting Tesla related forums. I have sent my concerns to both addresses, hopeful to get some response from either of them.
Day 9
It was a long weekend due to a public holiday, so I didn’t expect any replies until Monday. I was hoping for at least an automated acknowledgement of my inquiries though. Crickets, unfortunately. I waited till mid-day Monday hoping that once the morning email backlog is cleared (assuming Monday blues applies to every IT and customer service department) I will get some reply. Nope. I decided to call the Tesla Energy phone number and hopefully get some answers from a real human being. It worked. Sort of. While my concerns related to SolarEdge vs Delta inverter, its sizing and use of optimizers were cleared, I haven’t gotten the answer I was hoping for regarding the panel placement. A very supportive and knowledgeable lady on the other side told me that the placement is hindered by steeper than usual grade, preventing the installers from placing the panels on the more suitable slopes (East- or West-facing). I was assured though that the estimated calculations regarding my annual output would still cover my home energy needs, even with the proposed layout. Not completely satisfied with the answers, I said “thank you” and decided to go with it, at least for now.
My HOA requires you to submit an application for any architectural changes prior to such change. Solar panels fall into this category. Part of the application is to collect signatures from the neighbors that will be directly affected by such change – either a noise/construction crew’s presence during the installation or any affect the new structure might have on them and their property (line of sight, aesthetics, noise). Under normal circumstances, this would not be a problem. Collecting a signature from a few neighbors is as simple as paying them a visit and explaining what you are about to undertake. Unfortunately, it is a bit more tricky during pandemic and when one wants to respect general social distancing guidelines. Desperate times call for desperate measures, so we have decided to print multiple copies of the HOA application and leave them with each of the affected neighbors, together with a short note on what it is about and how to return the (hopefully) signed application. It took a couple of days to collect all of the responses, but by Monday I was finally ready to submit my application with the HOA. Things have changed since I had to deal with HOA last time and now it seems that there’s an online portal where I can submit it. Done. Now waiting for a response. Hope it won’t take too long and that it will be an “OK, go ahead”.
I also found another email address (MyProject@tesla.com) that some customers were using for any follow up, so decided to forward my previous email to this one. I have received an automated response that someone will come back to me as soon as possible. A good sign.
Day 10
I did some further digging around the issue of panel placement. Turns out, the person I spoke to at Tesla wasn’t completely off suggesting that it is OK to have these panels face North. There’s a lot of information out there, so one has to be careful to separate what is a marketing ploy to get you sign a contract without any regard for your ROI from a science-backed research. In conclusion, these are the key points I found relevant to my project:
- Photovoltaic panels have come down in price significantly in the past 5 years (some websites quote more than a 50% reduction in price), so much so that they are only a potion of the overall installation cost. The suggestion was not to worry too much about individual panel’s performance. As long as the overall output meets the expectations, mission accomplished.
- If the panel orientation is of concern, sizing up the system by adding more panels should not add too much to the overall project cost due to increased panels output and reduction in price (as compared to 5-7 years ago).
- Even when facing North and following the roof’s grade (not tilted up to face the Sun), the panels should still generate 50-60% of their nominal output. At least this is specific to the states that enjoy plenty of solar exposure year round (Florida, Texas, Nevada or California).
Still, since I am paying for it and hoping to cover all my energy needs, I would like the panels to be installed on the side of the roof that makes most sense. Call me stubborn. I decided to give Tesla another call, hoping to persuade my way through. The person I spoke to pretty much reiterated what I’ve already heard before: there is a maximum roof pitch that Tesla solar installers are not able to go beyond in concern of their safety. I asked if it is possible for someone to come and inspect my property in person rather than relying on satellite imaging and software only. I was told that they would request for that on my behalf.
Day 12
To my surprise, I saw a new notification on my phone that there are documents waiting for my review on Tesla’s website. There was an updated layout document waiting for my approval. This time round all the panels from the North slope were moved to the West side of the roof. Much better. I would still like to know if someone from Tesla will contact me and visit our property to examine it up close, but having all panels divided between South and West is a good start.
Day 13
I received a reply to my email and was assigned a Project Advisor. I have raised my concerns regarding the panel placement and asked if we could still reconsider and move some panels to the East. The Project Advisor forwarded me the response from the installation team that they would have to come and physically inspect the roof to reconfirm. Let’s see what comes in reply.
Day 14
HOA has officially approved our solar project. That was quick!
Day 18 – site survey
Look who’s here!
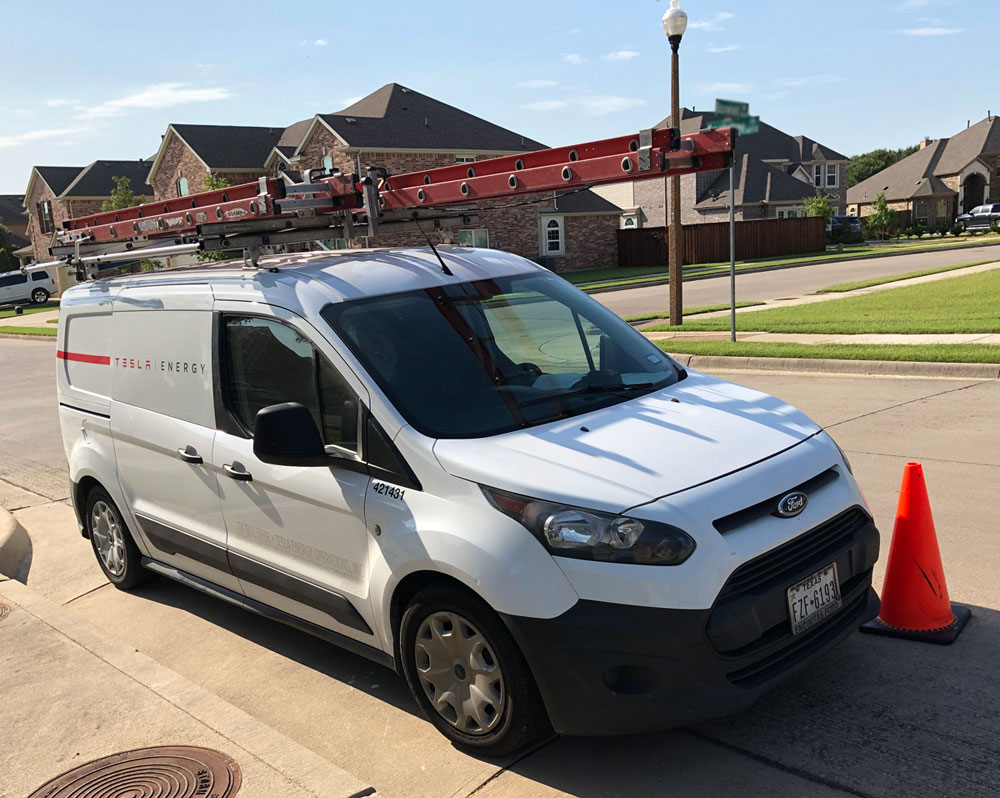
I received a text message yesterday to schedule an appointment for a detailed site survey. The process focuses mostly on exterior of the house, so the presence of the homeowner is not required. Since I was at home, I have shown the Tesla engineer what I had in mind for the placement of the Powerwalls and inverter. Taking advantage of me being at home, the engineer asked if he could use the attic entrance to take some additional pictures (for conduit work etc.).
Day 25
A bit of back and forth with Tesla on the final system layout and number of panels. Long story short, to offset the less-than-ideal panel orientation (there will be panels on the North-facing part of the roof after all), I decided on adding some panels to the project. The new system consists of 41 Q CELLS 340 W panels producing output up to 13.94 kWh.
Day 33
Looks like Tesla is ready to submit a permit application with the city before the installation can be scheduled. I was sent an updated application form and asked to provide an electronic signature.
Day 60
I’ve been checking my project page on Tesla’s website periodically to see if there is any status update. It still reads “Permit”. I’ve been also in contact with Tesla personnel who works with my city on the application. The answer so far was “still waiting”.
Out of curiosity, I went to the city’s website that let’s you see and track any permits submitted for your property. My search results did not return anything. Getting a bit concerned I have forwarded a screenshot of the search results to Tesla. In response, I was advised that the permit application involves multiple departments within the city and can take some time. I was also copied on the email correspondence they had so far with the city. Reading through, I have noticed that there was a request for additional documentation request/requirement from the city that has not been answered to for a month (!!!). Tesla finally replied and submitted the additional document only a day after I inquired about the status and was included in the email chain. Coincidence? I think not. Someone has dropped the ball at Tesla on this one.
I’m glad I asked about an update then!
Day 68
City has approved the application. Next step: awaiting response from Tesla to schedule the installation.
Bonus perk: I requested a copy of the documentation that was submitted with permit application and the city coordinator sent it to me. I had most of the documents already, but I was missing the schematics/plans. Finally some technical questions I had are answered. Yes, I will be getting Tesla Power Gateway 2. Yes, the panels will be equipped with SolarEdge power optimizers. Finally, yes, ZS Comp mounting system will be used to secure the panels to the roof.
Day 70 – permits obtained
Tesla has confirmed that all necessary permits were secured. I also received a prompt to proceed to their website and pick an installation date. Looks like the earliest available slot is on November 5th. Ouch. I was really hoping that it is going to be sooner than that. There is a mention that Tesla will push the schedule ahead if possible, but at this point I’d rather not build up my hopes. As long as it happens this year I am happy (so I can qualify for federal tax incentive). We shall see!
Day 119
I received a text message from Tesla Energy. They asked me to request a temporary power disconnect/reconnect with my city’s utility company for November 6th. This has to be initiated by homeowner. I take it as a confirmation that we are on schedule!
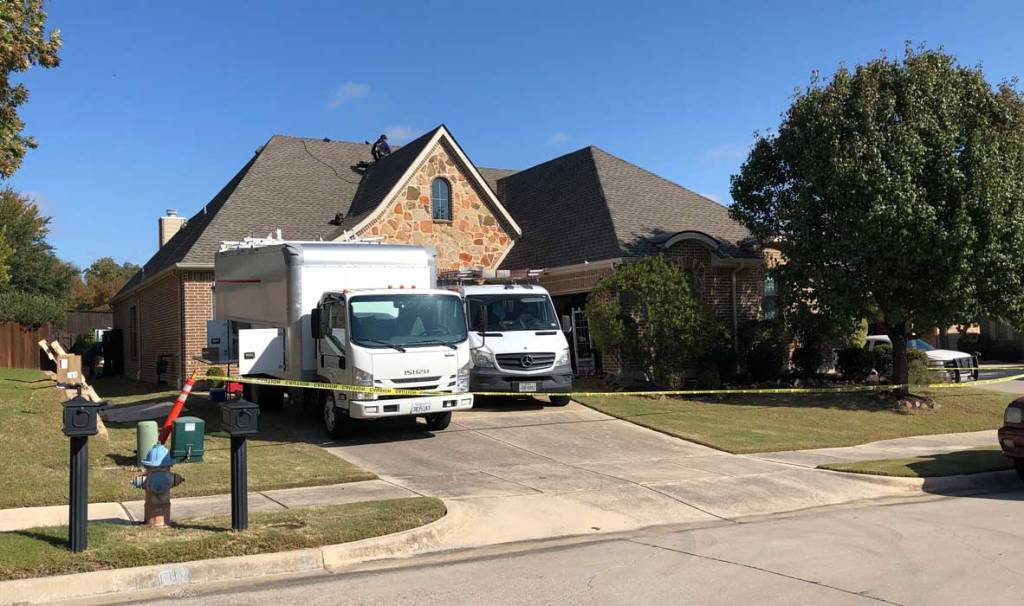
Day 121 – installation
The installation crew has arrived bright and early. Some of the guys were here way before the truck carrying all the equipment came, so they were just hanging out in their cars waiting.
Once the truck arrived, they promptly got to work. While most of the guys were busy unloading the hardware, the lead electrician went over the project layout with me, confirming the final placement of the Powerwalls, Tesla energy gateway (TEG) and SolarEdge inverter. We also discussed the solar panel layout and where potential conduits linking all individual arrays would go. I had some concerns about the roof conduits being visible from the street, but the electrician quickly addressed them by explaining that they will arrange them so that the overall aesthetic impact is kept to a minimum.


It is worth mentioning that Tesla is taking the safety of both their workers and any passers-by seriously. They cordoned off the immediate vicinity of the workplace with the tape and also advised me to stay away from the roof edges (unless I wear a hard hat). Good advice! It was hard for me to contain my excitement throughout the installation process, as I had been waiting for it to happen for so long! I did my best to stay out of the way and let the Tesla guys do their job. They will be my judge if I succeeded or not.
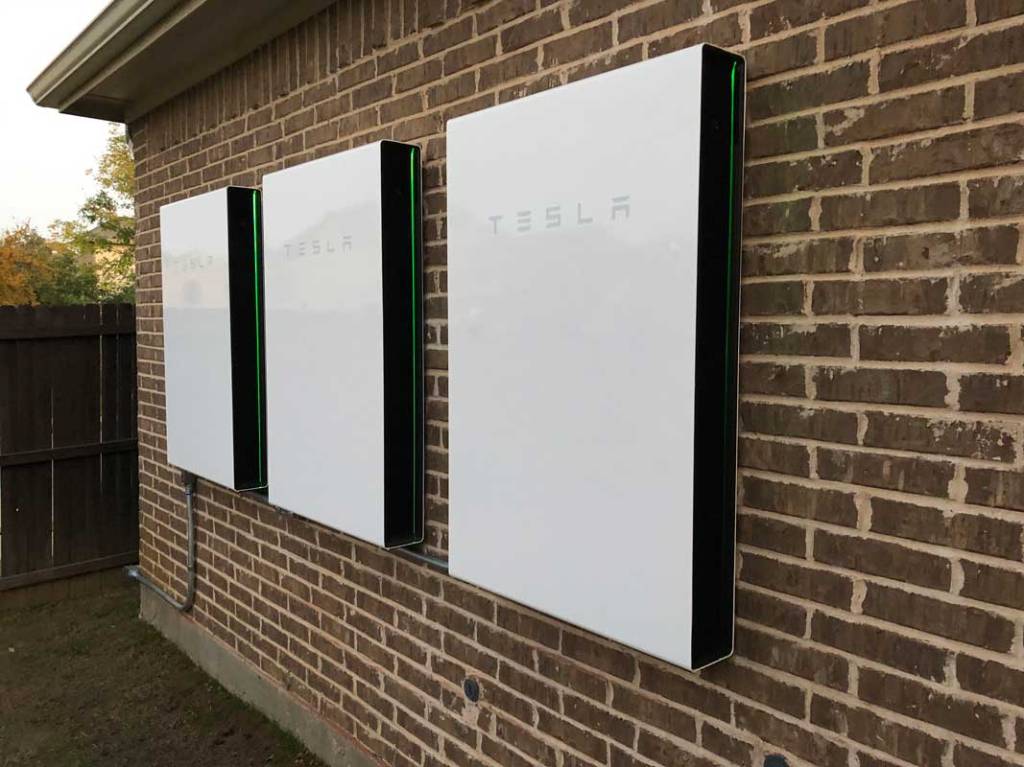
I was particularly stoked about the Powerwalls, so while the others were busy mapping and inserting the solar panel mounts on the roof I was sneaking up on electricians doing the heavy lifting (quite literally, as each Powerwall weights over 200 pounds!).

While I was busy pestering these guys, the other crew already made some headways with the solar panels.
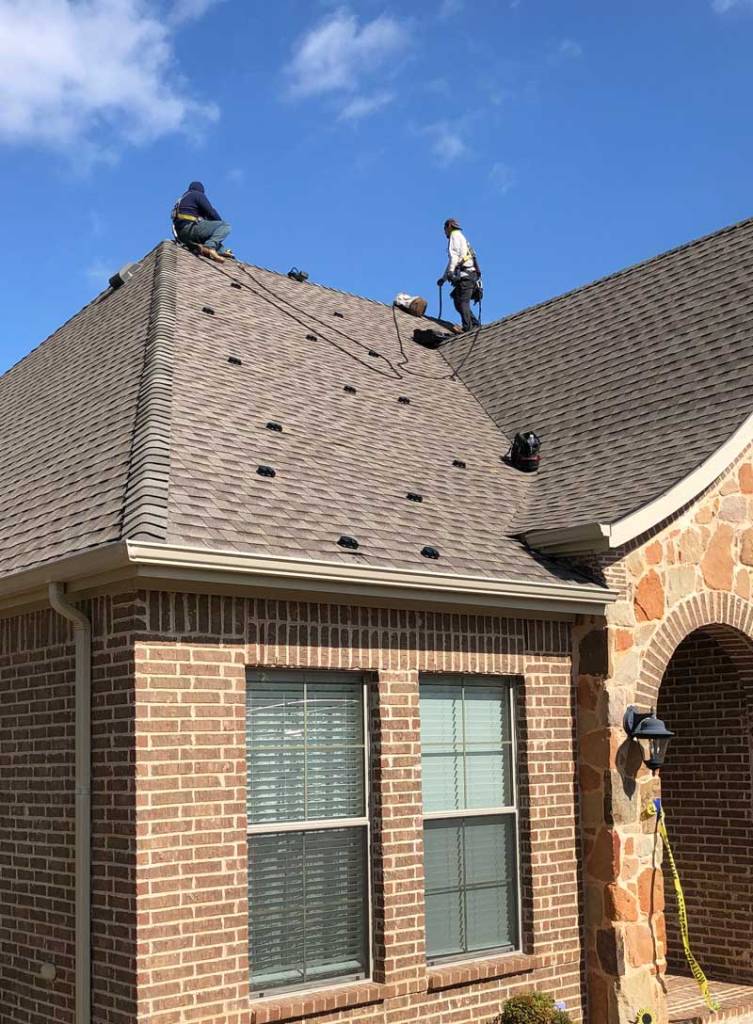

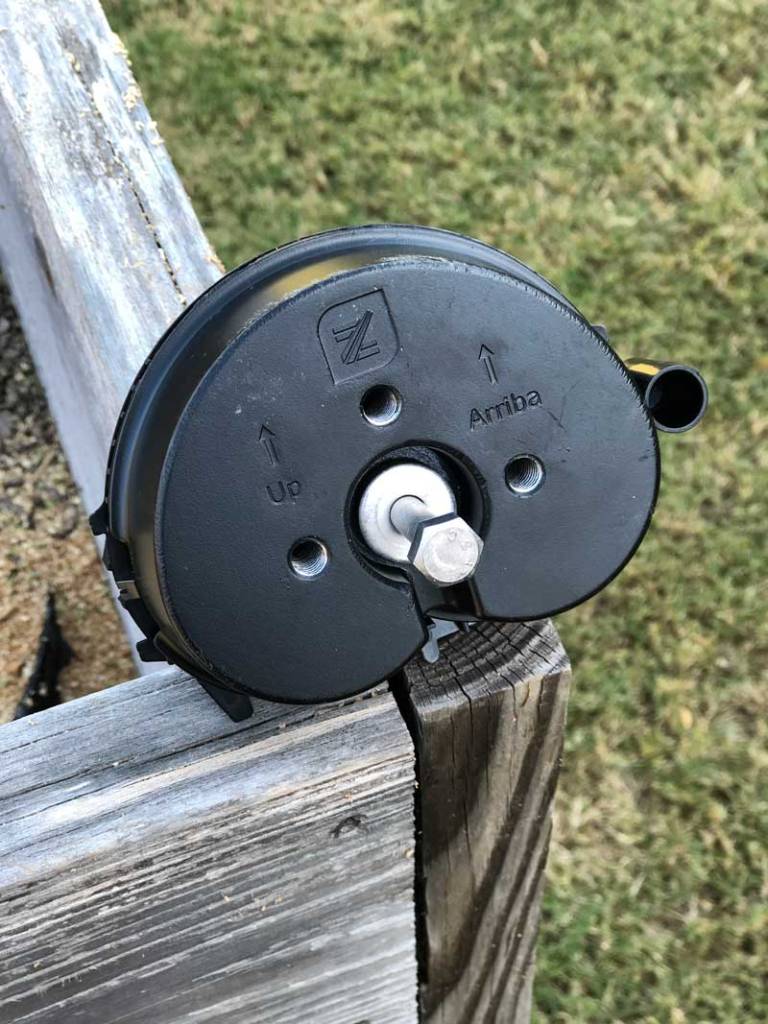
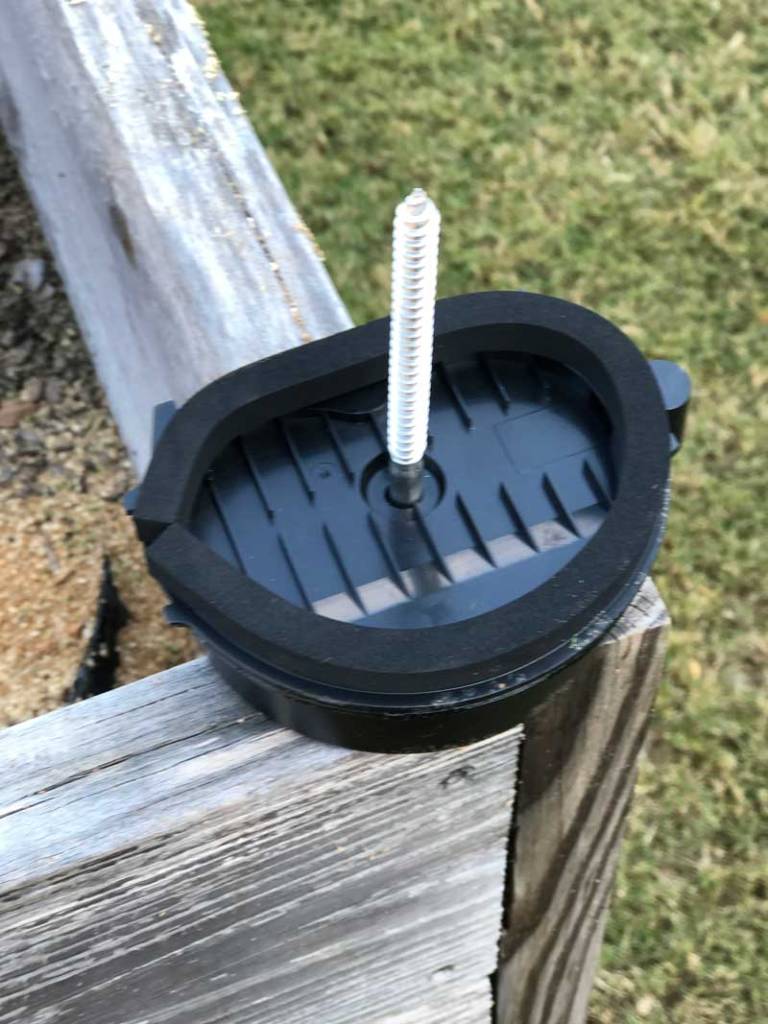
It is worth mentioning that Tesla is using ZS Comp type of mounting hardware. Compared to traditional rails, it has a reduced impact on the roof (less holes). The mounts themselves are cleverly designed with water-proofing in mind. They come with a groove/duct that, once filled with roof caulking, will provide a tight seal around the base, thus preventing water from entering.
By the end of the first day of the installation, the Tesla crew was done with most of the panels, Powerwalls, the energy gateway and connecting conduits.


Day 122
Again, the guys have arrived early and gotten busy with work. The visual progress of the remaining tasks might not be as obvious as on the first day of the installation, but there was still a lot of tasks to be completed. Not necessarily in the order of complexity or importance, but here’s what kept the crew busy:
- secure the remaining panels to the roof
- run the necessary conduits and place the junction boxes interconnecting various parts of the array
- do all the wiring between Powerwalls, TEG, inverter, main braker panel and solar panels
I also opted in for the installation of the Tesla high power wall chargers (HPWC) at the same time. I had them for a while, but was deliberately delaying the installation My garage doubles as a woodworking shop, so the space is a precious commodity. I wanted to make sure I won’t interfere with any equipment that comes with photovoltaic system. Now was the time.

Before long, the guys were done with the installation and the only remaining tasks involved setting up the energy gateway, commissioning the inverter and performing initial tests. Things were looking good!

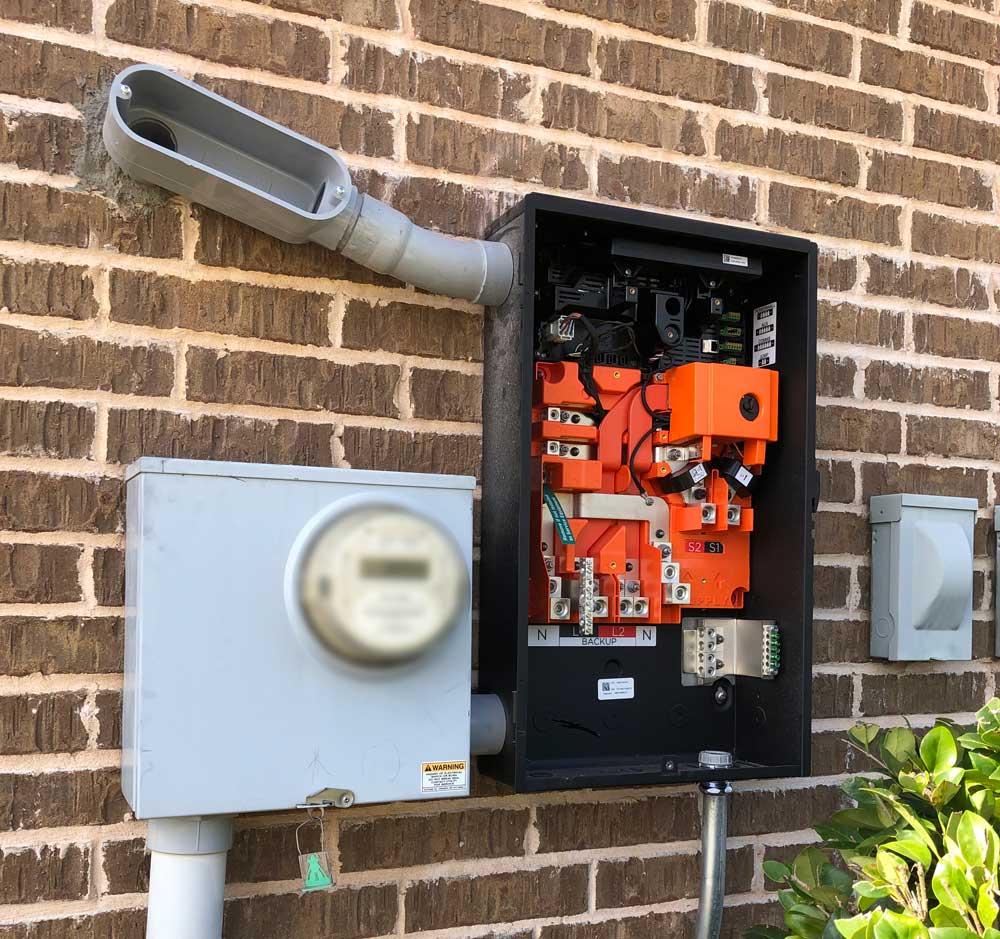
The new Tesla Energy Gateway looks slick! 
SolarEdge inverter next to main electrical panel.
By the end of the installation, the electricians tested the grid disconnection (simulating the power outage) and guided me on how to turn the system on once I receive the PTO (permission to operate) from the utility company.
I must commend the Tesla installation team for their professionalism and thoroughness. Everything turned out top notch. Before they left, they ensured to collect any piece of debris to leave the place in a clean state. I am very impressed and thankful!
Day 126 – inspection (fail!)
The installation was completed on Friday. Right before the crew left my place, I received a call from Tesla informing me that the inspection is scheduled for the following Monday. That was quick!
On Monday morning, both the inspector from the utility company and a Tesla representative showed up at my house. The inspection process was rather quick. Unfortunately, we didn’t get a “pass”. There were couple of minor issues that the inspector wanted to be addressed before he could approve the setup.
Day 127 – inspection (pass!)
All the issues were addressed by Tesla and the inspector was happy with the outcome when he visited the following day. We passed this time round.
Day 132 – almost there
The closer it gets, the more impatient we get. I was going back and forth between the utility and Tesla to figure out how long it is going to take before I receive the PTO. It came to a stalemate of sorts. The utility company required the system to be fully operational and producing the energy, so they can conduct the anti-islanding test. Here’s the catch: Tesla will not allow you to turn the system on before you receive the permission to operate. Neither side would give me the go ahead at first, citing potential liability. Both parties aligned at the end and I was allowed to turn the system on for necessary testing. Progress at last.
Day 141 – we are live!
I was surprised by the doorbell ring this morning. It was an electrician from the utility company coming to swap the existing meter for the one compatible with photovoltaic system. Hell, yeah!
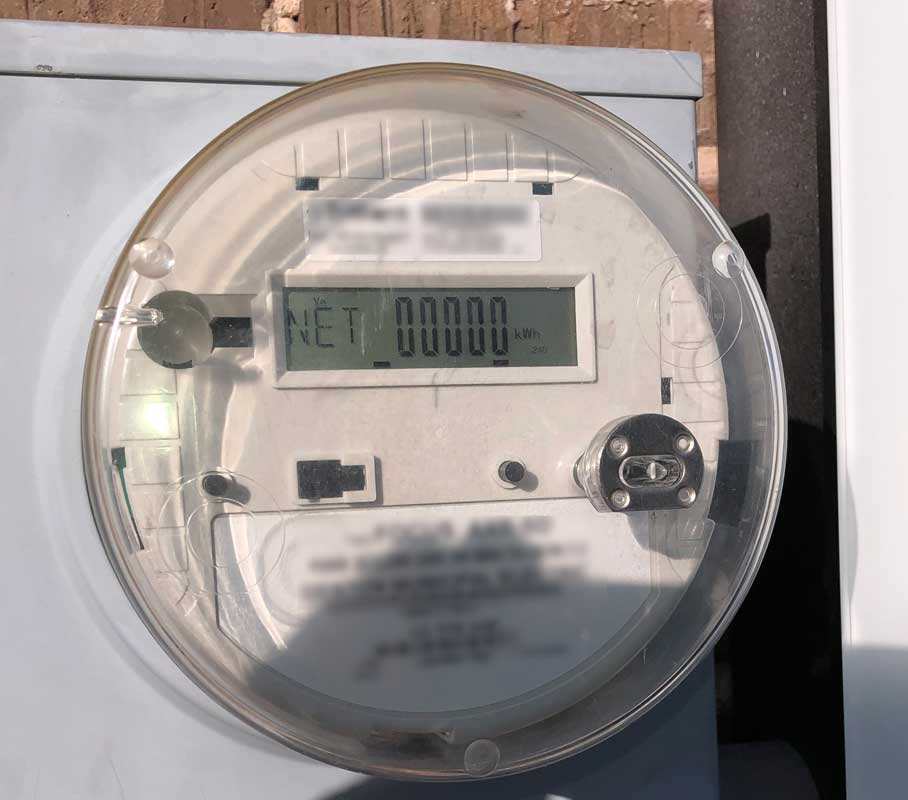
Shortly after, I received an email from the utility company with the attachment I was waiting for: Permission To Operate! Double “hell, yeah!”
After a long 5 months we are finally generating our own electricity!
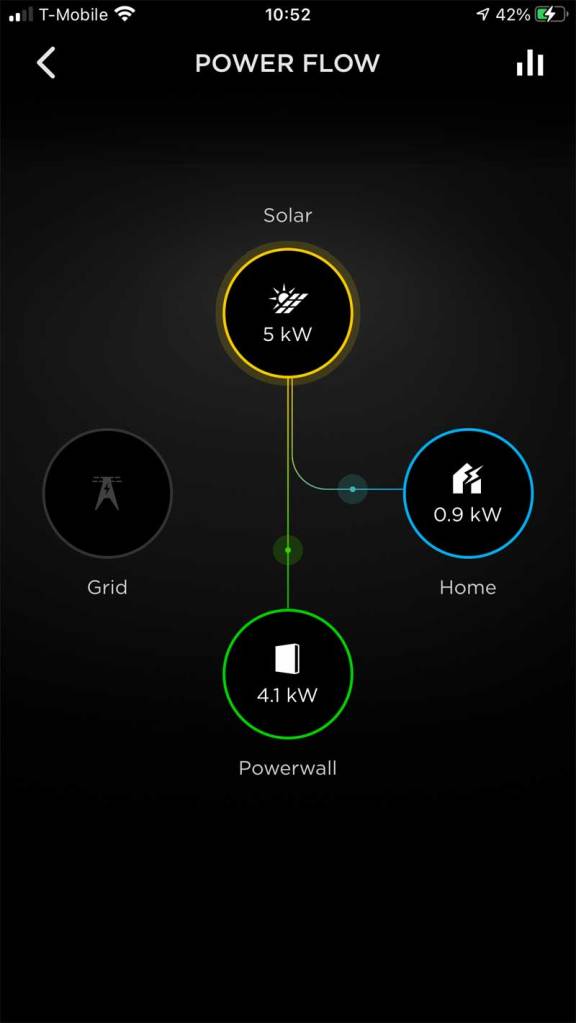
It was a journey full of twists and turns – some anticipated based on my prior research, others came as a surprise. At the end, the joy of being self-sufficient and powered by renewable energy far outweighs any shortcomings we encountered along the way. As a geek, I have a new hobby: staring at the Tesla app showing the flow of energy. Hope it is curable 🙂
It is a brand new experience for me to be self-powered. I will be reporting on the findings soon. If you managed to stick around all the way to the end, thanks for your patience. Hope you find this article helpful. Feel free to reach out if you have any additional question. Thank you.
